I had started down the road of redoing the covers of the games
I featured in my recent The Industrious Rabbit post about
Nintendo Entertainment System Memory Management Controllers,
The NES: Cartridge Constraints,
but decided to switch instead to the memory magician acting out the game using balloon props instead.
I did manage to finish one that came out pretty great, and it’s a rework
of the cover of the game Arkista’s Ring. Enjoy!
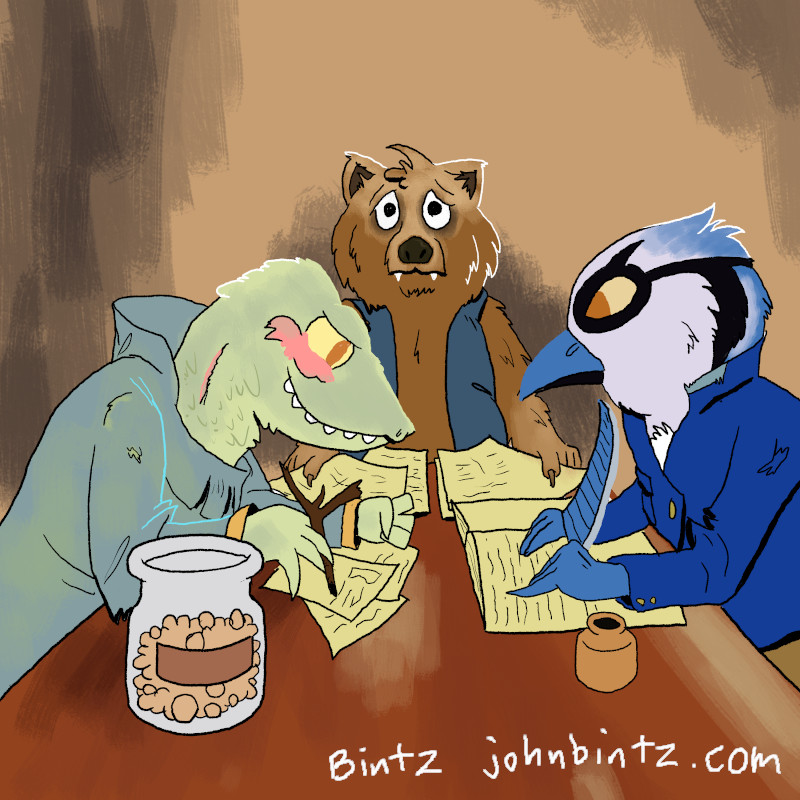
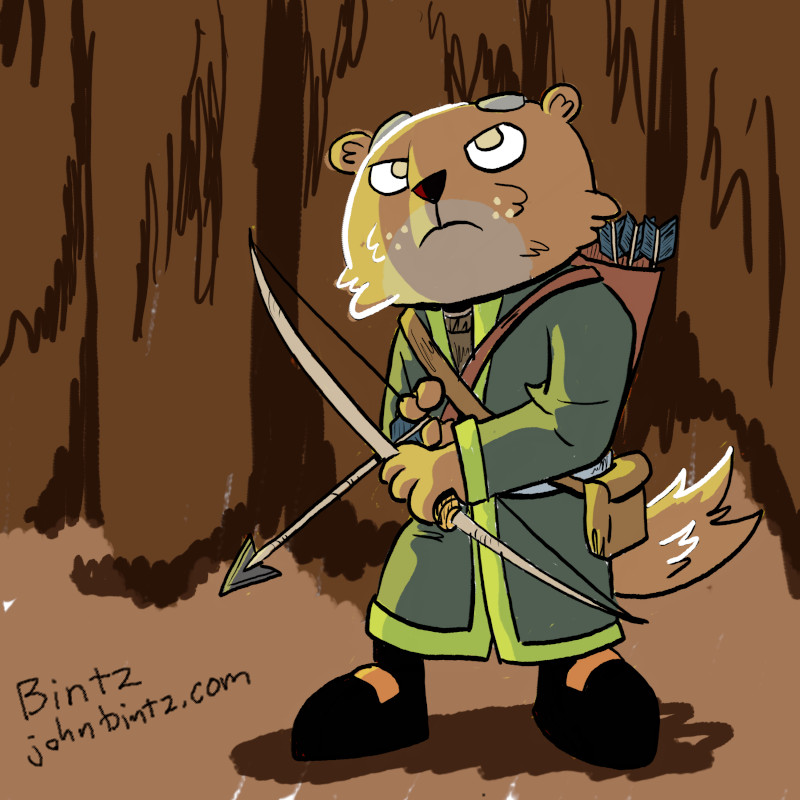
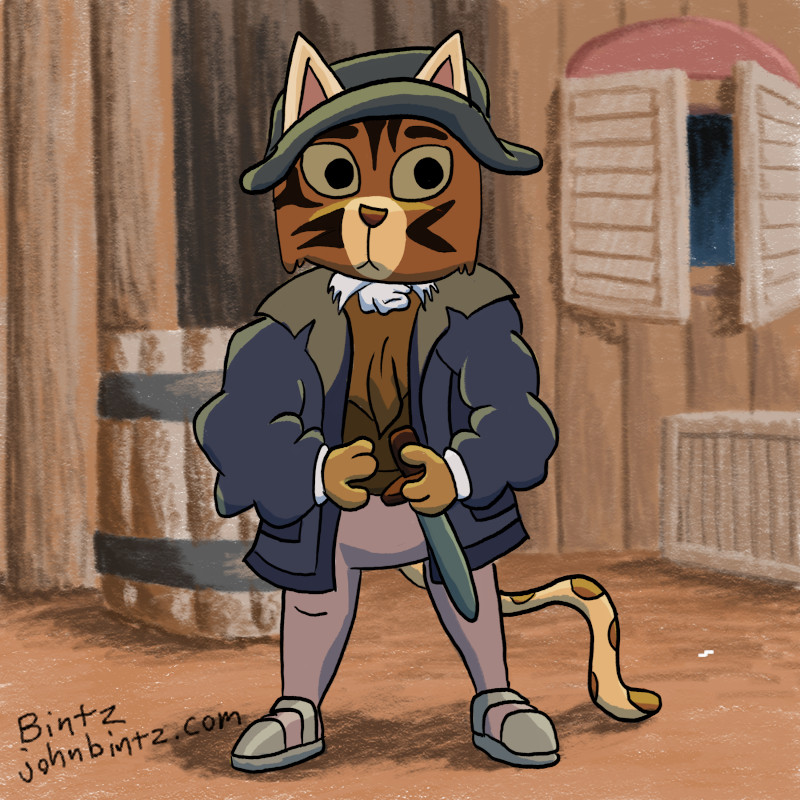
These are some characters built for a Root RPG campaign that I’ve been
running for quite a while. I’m sure that I’ve referred to their existence while
playing actual board games of Root. This post is for the
Root Fan Art
contest, and this is just a small sample of the art I’ve built over the past year.
These pieces just happen to be the best. Hashtag RootFanArt. Enjoy!
I’ve been doing some blog posts on
The Industrious Rabbit
on how older computers
manage their memory, and with some of the research I’ve been doing into the
NES and the Amiga, I’ve wanted to mess around with a fantasy console platform.
I decided to get into messing with TIC-80.
I had wanted to experiment with
PICO-8,
but I also wanted Android export and wanted to support an open source
project as well.
I decided for my first project to try a few things:
Import an image
Do scanline palette changing
Write an audio track
Do a stupid text thing
Here’s some things I learned:
Image importing is .gif only. The colors in the image when you import
them will match the built in game’s palette as best as possible.
Which means that, if you have a 4 color GIF, color 0 in the GIF may not become
color 0 in the imported sprite.
In the music editor, the tracks are the individual tunes,
the rows dictate the length of each frame in the track, and a frame is a
collection of notes, kind of like a group of measures.
You’ll need to put rests inbetween notes to get notes to turn on and off.
I use DokuWiki along with Wekan to organize my comic and animation
projects. Both
The Wizard and The Metalsmith
and
The Industrious Rabbit
have a combo of DokuWiki for scripts,
marketing details, links/reference material, and other long-form text
content, and Wekan is my big ol’ kanban board for managing work.
Since the original DokiWiki was a few years out of date, and a lot has changed
both in DokuWiki and the PHP world in general, the app’s going to be updated
slowly to the latest revision, so those folks with plugins installed that
may fail on newer DokuWikis have time to get that resolved before new
versions come along. Check the GitHub Repo
for more information on that process, and if you have PRs/questions/etc.
I want to take over a Sandstorm app! How do?
So you have a favorite app you want to start maintaining, and it
might even be one of mine if I decide to stop maintaining Hugo or
DokuWiki. How do you take it over? Well, here’s the process I went through with
taking over Hugo and DokuWiki. This is current as of July 2020.
Get the project running locally, in its current state and at the version
matching what’s in the App Store. Depending on the quality of the
project’s repository and the project itself, this may be very easy or
very hard. This might
also require a lot of internet searching, lots of machine provisioning
and reprovisioning using Vagrant, learning how to log debug output to
stdout and stderr from whatever services encompass the app, and
poking around a running grain using vagrant-spk enter-grain.
Unless something is truly broken, this is not the time to fix up
minor annoyances.
Export this unupdated app to a .pkg file via vagrant-spk pack.
You’ll have to do the GPG and Keybase dance to be able to sign the package,
so create a GPG key
if you don’t already have one. Commit and push a new branch with this set of
modifications so you can roll back to this state easily.
Upgrade the app. Depending on the application, this may involve a small
upgrade at first, or may involve going straight to the latest version.
I went to the latest version with Hugo and added a note about breaking
changes in the admin area of the app as well as on the app’s app store
page. With DokuWiki, I planned a set of smaller upgrades,
taking a few weeks to get up to the latest version, since DokuWiki
is a much more complicated piece of software to upgrade than Hugo.
Get the updated app running correctly, and export it
to a different .pkg file via vagrant-spk pack.
Create a fake Sandstorm project that doesn’t have an app
associated with it using vagrant-spk init in an empty folder.
Install the unupdated app via direct upload of the .pkg file
into this fake project and make sure it works correctly, spawning
whatever grains you need to for testing. You do not need to use
vagrant-spk dev for this part. Starting the VM gives you a
sandboxed Sandstorm to mess with without doing anything else.
Upload the updated app .pkg and upgrade your test grains in this VM.
Make sure a grain upgrade works correctly.
If the original repo has a message about looking for a new maintainer,
try asking there if they want to turn it over to you. Otherwise,
head to the sandstorm-dev mailing list
and state your intent to take over maintenance.
You’ll eventually be given a keyfile to cat onto your Sandstorm
keyring. Do just that: cat < provided-key >> ~/.sandstorm/sandstorm-keyring.
Ensure the app ID for the original app shows up with vagrant-spk listkeys.
Back up your keyring before doing the cat just in case!
Publish your app to the app store and wait for feedback. Depending
on the level of changes, it can be a while to get feedback and
to get the updated app to the quality level it needs to be at.
After your app has made it onto the store and you’ve successfully
done a release or two, consider automating the upgrade process as
much as you can, where you can, to reduce the friction of
putting out new releases. I do this with
hugo-sandstorm and
dokuwiki-sandstorm.
Wherever you’re hosting the repo, ensure you can get feedback from
users, and, more importantly, code from contributors.
Once you have a few releases out, and can maintain a release schedule,
then worry about fixing minor annoyances or edge case bugs.
Remember, you’re spending your free time on this, so choose
wisely what you work on, and ask for help when possible!
If you ever decide to give up maintenance, let sandstorm-dev know,
put a notice on the README for the repository, and (optionally)
make the repo read-only so that no new issues can be posted.
If someone else wants to take it over, they can fork it and repeat
this very process!
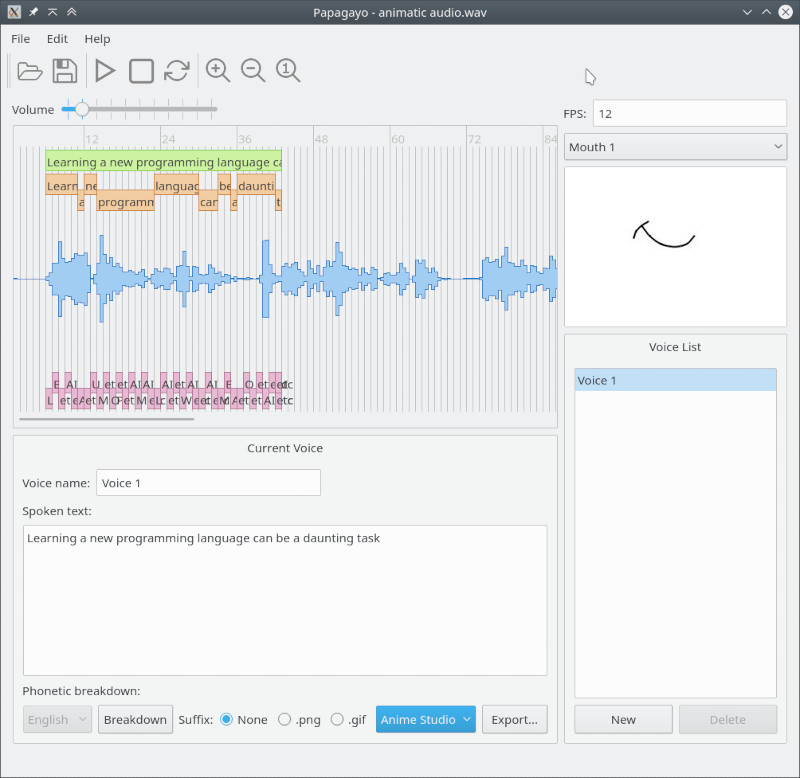
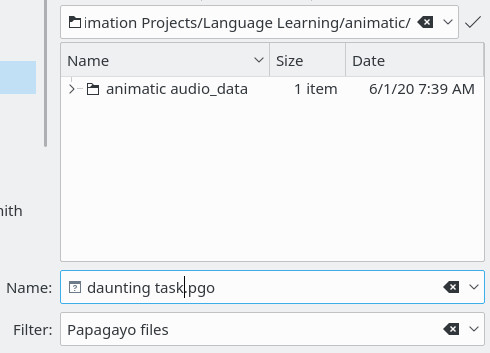
With the animation I’m working on I want some help breaking down the
lip movements that Bamboo is going to have to make while talking.
I saw that Synfig has support for loading Papagayo lip sync files
so I took a look at the 2.0, C++ version of the project and saw it was quite abandoned.
I decided to incorporate a bunch of the great fixes to the software over
the years, as well as a tweak of my own, to the all-the-fixes
branch on my forked repo. And, to make sure it’s working as
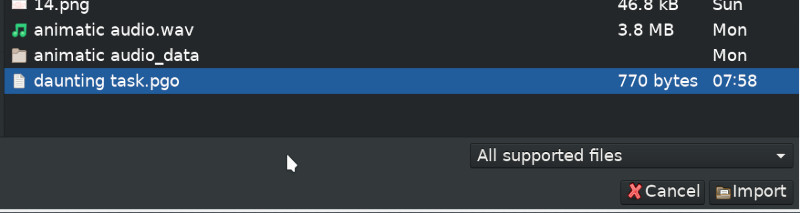
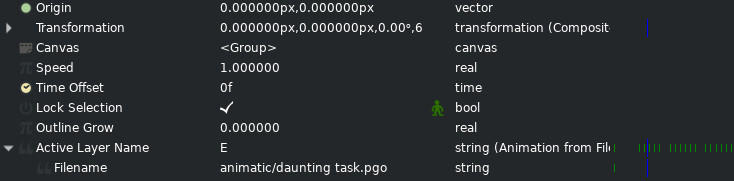
intended, I created a lip sync from my animatic audio in the forked version:
…and loaded it into Synfig:
I’m not looking to become a hardcore maintainer of Papagayo. I just want it
working well enough for my animation work. If you want to help keep it going,
pull requests are best!
Update: I found the Python-based 1.x fork called Papagayo-NG
which seems better maintained and has AppImages. I may try this one out
as well. The project is also more active
than the original one.